Understanding the Importance of Contact Transfer

Before diving into the methods, it’s essential to understand why transferring your contacts is so crucial. Your contact list is more than just names and numbers; it includes email addresses, social media profiles, and other valuable information that helps you stay connected with friends, family, and colleagues. Ensuring that this information is accurately transferred to your new device will help you avoid losing important connections and streamline your transition to a new phone.
Preparing for the Transfer
Backing Up Your iPhone Contacts
The first step in transferring your contacts is to ensure that your iPhone data is backed up. This step is crucial to prevent data loss and to ensure that you have a copy of your contacts if anything goes wrong during the transfer process.
Using iCloud Backup
- Connect to Wi-Fi: Ensure your iPhone is connected to a stable Wi-Fi network.
- Go to Settings: Open the Settings app on your iPhone.
- Tap on Your Name: Select your name at the top of the screen to access your Apple ID settings.
- Select iCloud: Tap on “iCloud.”
- Enable Contacts Sync: Toggle on the switch next to “Contacts.”
- Back Up Now: Go back to the main iCloud settings and tap on “iCloud Backup.” Tap “Back Up Now” to start the backup process.
Using iTunes Backup
- Connect iPhone to Computer: Use a USB cable to connect your iPhone to your computer.
- Open iTunes: Launch iTunes on your computer (or Finder on macOS Catalina and later).
- Select Your Device: Click on the device icon in iTunes or Finder.
- Back Up Now: In the “Backups” section, choose “This Computer” and click “Back Up Now.”
Preparing Your Android Device
While your iPhone contacts are being backed up, you should also prepare your Android device for the transfer.
- Charge Your Android Device: Ensure that your Android device is fully charged or plugged in during the transfer process.
- Connect to Wi-Fi: Make sure your Android device is connected to a Wi-Fi network.
Methods to Transfer Contacts from iPhone to Android

Using Google Account Sync
One of the easiest methods to transfer contacts is by using your Google account. This method involves syncing your contacts with your Google account and then syncing them to your Android device.
Syncing Contacts to Google Account
- Go to Settings on iPhone: Open the Settings app on your iPhone.
- Tap on Mail: Select “Mail” (or “Contacts” on some versions).
- Add Account: Tap on “Accounts” and then “Add Account.”
- Choose Google: Select “Google” from the list of account types.
- Sign In: Enter your Google account credentials and sign in.
- Enable Contacts Sync: Toggle on the switch next to “Contacts” to sync your contacts with your Google account.
Syncing Contacts to Android Device
- Go to Settings on Android: Open the Settings app on your Android device.
- Accounts: Tap on “Accounts” or “Users & Accounts.”
- Add Account: Select “Add Account” and choose “Google.”
- Sign In: Enter your Google account credentials and sign in.
- Sync Contacts: Ensure that “Contacts” is enabled for sync.
Using iCloud and a VCF File
Another method involves exporting your contacts from iCloud and importing them to your Android device using a VCF (vCard) file.
Exporting Contacts from iCloud
- Go to iCloud.com: Open a web browser and go to iCloud.com.
- Sign In: Enter your Apple ID credentials and sign in.
- Select Contacts: Click on the “Contacts” app.
- Select All Contacts: Press “Ctrl + A” (Windows) or “Command + A” (Mac) to select all contacts.
- Export as VCF: Click on the gear icon in the lower-left corner and choose “Export vCard.”
Importing Contacts to Android
- Open Contacts App: Open the Contacts app on your Android device.
- Import Contacts: Tap on the three dots in the upper-right corner and select “Import.”
- Choose VCF File: Select “Import from .vcf file” and locate the VCF file you exported from iCloud.
- Import Contacts: Follow the prompts to complete the import process.
Using Third-Party Apps
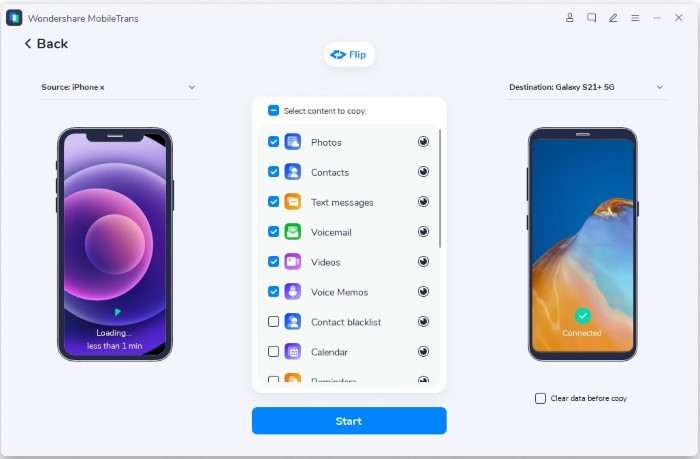
Several third-party apps are designed to simplify the process of transferring contacts between iPhone and Android devices. These apps often provide additional features and ease of use.
Recommended Apps
- Move to iOS: Apple’s Move to iOS app can help you transfer contacts, messages, photos, and more from iPhone to Android. However, it’s worth noting that the primary use is for moving from Android to iPhone.
- Copy My Data: This app is available on both iOS and Android and can transfer contacts, photos, and videos between devices.
- Contacts Transfer App: Available on the Google Play Store and Apple App Store, this app facilitates the transfer of contacts from iPhone to Android.
Using a Third-Party App
- Install the App: Download and install the chosen app on both your iPhone and Android devices.
- Follow Instructions: Open the app on both devices and follow the instructions provided to transfer your contacts.
Using a SIM Card
If both your iPhone and Android devices use the same size SIM card, you can transfer contacts using the SIM card.
Exporting Contacts to SIM Card on iPhone
- Open Settings: Go to Settings on your iPhone.
- Contacts: Tap on “Contacts.”
- Import SIM Contacts: If you have the option to “Import SIM Contacts,” choose it. This step will save your contacts to the SIM card.
Importing Contacts from SIM Card on Android
- Open Contacts App: Open the Contacts app on your Android device.
- Import Contacts: Tap on the three dots in the upper-right corner and select “Import.”
- Choose SIM Card: Select “Import from SIM card” and follow the prompts to complete the import process.
Troubleshooting Common Issues

Missing Contacts
If you notice that some contacts are missing after the transfer, consider the following:
- Check Sync Settings: Ensure that sync settings are correctly configured on both devices.
- Re-import VCF File: If using a VCF file, try re-importing the file to ensure no contacts were skipped.
- Update Apps: Make sure all apps and operating systems are up-to-date.
Duplicate Contacts
To manage duplicate contacts:
- Use Contact Management App: Many contact management apps are available that can help you merge duplicate contacts.
- Manually Merge: Open your Contacts app and manually merge duplicate entries if necessary.
Contact Formatting Issues
If contact information appears incorrectly formatted:
- Review Contact Details: Check the contact details and ensure they are correctly formatted on your iPhone before the transfer.
- Update Contact Information: Edit and update the contact information on your Android device as needed.
Final Tips for a Smooth Transition
- Verify All Contacts: After the transfer, take some time to verify that all contacts have been transferred correctly and are accessible.
- Regular Backups: Regularly back up your contacts to prevent data loss in the future.
- Explore Contact Apps: Many third-party apps can enhance contact management and provide additional features.
Related Post:
How to Scan with Android: A Complete Guide for Seamless Document Management
How to Block Text Messages on Android: A Complete Guide for Hassle-Free Communication
How to Remove Safe Mode on Android: A Complete Guide
Transferring contacts from an iPhone to an Android device doesn’t have to be a challenging task. With the right methods and tools, you can ensure that your contact information is accurately transferred and readily accessible on your new device. Whether you choose to use Google account sync, export/import VCF files, or utilize third-party apps, each method offers its advantages to suit your preferences and needs. By following this guide, you’ll be well-equipped to make the transition smoothly and efficiently.


