What is Cache and Why Should You Clear It?

Before diving into the step-by-step process of clearing cache, it’s important to understand what cache is and why it accumulates on your device.
Understanding Cache
Cache is a temporary storage space on your device that holds data from apps and websites you frequently use. This data is stored to speed up the loading times of these apps and websites, providing a smoother user experience. For example, when you visit a website, your browser saves images, scripts, and other elements in the cache so that it doesn’t need to reload them every time you visit.
The Need for Clearing Cache
While cache is meant to improve performance, it can sometimes become a double-edged sword. Over time, cache files can accumulate and take up valuable storage space on your device. Additionally, outdated or corrupted cache files can lead to app malfunctions, slow performance, and other issues. Clearing the cache periodically helps to:
- Free Up Storage Space: Cached data can consume a significant amount of storage over time. Clearing it can help free up space for other important files and apps.
- Improve Performance: Removing outdated or corrupted cache files can resolve performance issues and improve the responsiveness of your device.
- Fix App Issues: If an app is misbehaving or not working correctly, clearing its cache can often resolve the problem.
How to Clear Cache on Samsung Galaxy Android Devices

Now that you understand the importance of clearing cache, let’s explore the different methods to do so on your Samsung Galaxy Android device.
Clearing Cache for Individual Apps
Sometimes, it’s not necessary to clear the cache for the entire device. Instead, you can target specific apps that may be causing issues.
Accessing App Settings
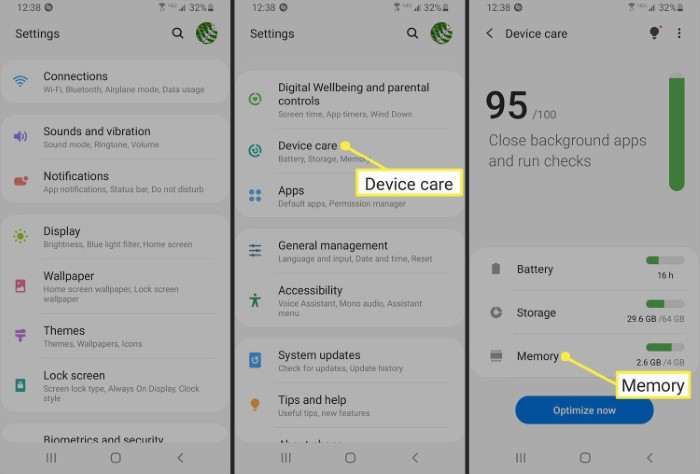
- Open the Settings App: Locate and open the Settings app on your Samsung Galaxy device.
- Navigate to Apps: Scroll down and select “Apps” or “Applications,” depending on your device’s version of Android.
- Select the App: Find and tap on the app for which you want to clear the cache.
Clearing the Cache
- Tap on Storage: Within the app’s settings, look for and tap on “Storage.”
- Clear Cache: You will see an option to “Clear Cache.” Tap this option to remove the cached data for that specific app.
Clearing System Cache Partition
Clearing the system cache partition can help resolve system-wide issues and improve overall performance. This method is particularly useful if you are experiencing problems with multiple apps or the device itself.
Booting into Recovery Mode
- Turn Off Your Device: Press and hold the power button, then select “Power Off” to turn off your device.
- Enter Recovery Mode: Press and hold the Volume Up button and the Power button simultaneously. Once the Samsung logo appears, release the Power button but continue holding the Volume Up button until you enter Recovery Mode.
- Navigate to Wipe Cache Partition: Use the volume buttons to navigate to “Wipe Cache Partition” and use the Power button to select it.
Clearing the Cache Partition
- Confirm the Action: Confirm your choice by selecting “Yes” when prompted.
- Reboot Your Device: Once the cache partition is cleared, select “Reboot System Now” to restart your device.
Clearing Cache for Web Browsers
If you’re experiencing issues with web browsers like Google Chrome, clearing the cache can resolve problems related to browsing and loading websites.
Google Chrome
- Open Chrome: Launch the Google Chrome app on your Samsung Galaxy device.
- Access Settings: Tap the three vertical dots (menu) in the upper-right corner and select “Settings.”
- Clear Browsing Data: Scroll down and tap on “Privacy and Security,” then select “Clear Browsing Data.”
- Choose Cached Images and Files: Ensure that “Cached Images and Files” is selected, then tap “Clear Data.”
Samsung Internet Browser
- Open Samsung Internet: Launch the Samsung Internet app.
- Access Settings: Tap the menu button (three horizontal lines) and select “Settings.”
- Clear Browsing Data: Tap on “Privacy” and then select “Delete Browsing Data.”
- Select Cached Images and Files: Ensure that “Cached Images and Files” is checked, then tap “Delete.”
Using Third-Party Apps to Clear Cache
Several third-party apps can help you manage and clear cache files more efficiently. These apps often offer additional features such as junk file removal and system optimization.
Popular Cache Clearing Apps
- CCleaner: A popular app that offers cache cleaning, junk file removal, and system optimization.
- Files by Google: This app not only helps with cache cleaning but also provides storage management and file organization.
How to Use Third-Party Apps
- Download and Install the App: Go to the Google Play Store, search for the cache-clearing app of your choice, and install it.
- Open the App and Follow Instructions: Launch the app and follow the on-screen instructions to clear cache files and optimize your device.
Common Issues and Troubleshooting

While clearing cache is generally a straightforward process, you may encounter some issues along the way. Here are a few common problems and their solutions:
Cache Files Not Clearing
If you’re having trouble clearing cache files, try the following:
- Restart Your Device: Sometimes a simple restart can resolve temporary glitches.
- Update Your Apps: Ensure that your apps and system software are up to date, as updates may fix bugs related to cache management.
- Factory Reset: As a last resort, performing a factory reset can resolve persistent issues, but make sure to back up your data before proceeding.
Slow Performance After Clearing Cache
If your device seems slower after clearing the cache, it could be due to:
- Rebuilding Cache: After clearing cache, your device may need to rebuild cache files, which can temporarily affect performance.
- Other Issues: Persistent performance issues might be related to other factors, such as low storage or outdated software.
App-Specific Issues
If an app continues to malfunction after clearing its cache:
- Check for App Updates: Ensure that the app is updated to the latest version.
- Reinstall the App: Uninstall and reinstall the app to fix any issues related to its cache files.
Best Practices for Cache Management
To keep your Samsung Galaxy device running smoothly, follow these best practices for cache management:
Regular Cache Clearing
Make it a habit to clear cache files periodically to maintain optimal performance and free up storage space.
Monitor Storage Usage
Keep an eye on your device’s storage usage and remove unnecessary files and apps to ensure smooth operation.
Use Built-in Tools
Take advantage of built-in tools and settings on your Samsung Galaxy device to manage and optimize performance.
Related Post:
Where Are My Downloads on Android?
How to Set an Alarm on Android
How to Scan Documents on Android
Clearing cache on your Samsung Galaxy Android device is a simple yet powerful way to enhance performance, free up storage space, and resolve various issues. By following the steps outlined in this guide, you can ensure that your device remains responsive and efficient. Whether you choose to clear cache for individual apps, the system cache partition, or web browsers, regular maintenance will help keep your Samsung Galaxy in top shape.
Remember, while clearing cache can resolve many issues, it’s also important to monitor your device’s performance and storage usage regularly to ensure a smooth and enjoyable user experience.


