Why Transferring Contacts is Important

Your contacts list is one of the most crucial data sets on your phone, consisting of family members, friends, work colleagues, and important connections. Losing these contacts can disrupt both your personal and professional life. By transferring them from one Android phone to another, you ensure continuous access to all your contacts without having to rebuild your phonebook from scratch.
Common Methods to Transfer Contacts
There are several efficient methods for transferring contacts between Android phones. Depending on your preferences, one method may be more suitable than the others. Here are the most commonly used methods:
- Using Google Account (Cloud Syncing)
- Transfer via Bluetooth
- Transferring via SIM Card
- Using Third-Party Apps
- Sharing via Email
- Exporting and Importing VCF File
Let’s delve into each method step by step, so you can choose the best one for your needs.
Transfer Contacts Using Google Account
One of the simplest and most efficient methods to transfer contacts from one Android device to another is by using your Google account. This process ensures your contacts are always synced across your devices, and you can retrieve them anytime, anywhere.
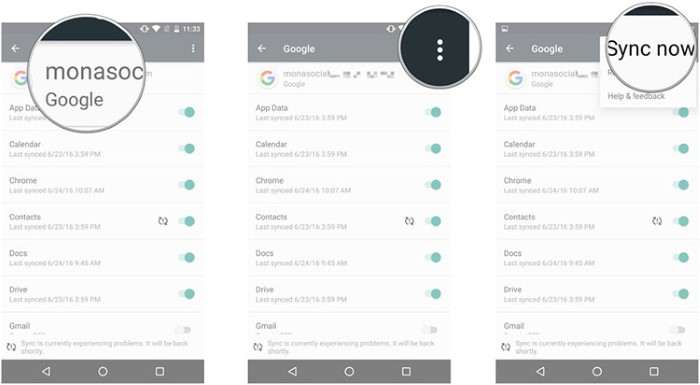
Sync Contacts on the Old Android Device
To begin, ensure that your contacts are synced with your Google account on your old Android phone.
- Go to Settings on your old Android phone.
- Scroll down and tap on Accounts (or Users & Accounts).
- Select your Google account.
- Tap on Account Sync.
- Make sure that Contacts is toggled on to sync.
Log In on the New Android Device
Once your contacts are synced to your Google account, transferring them to your new phone is easy.
- Turn on your new Android phone and connect it to a Wi-Fi network.
- During the setup process, you’ll be asked to log in to your Google account.
- After logging in, ensure that Contacts Sync is enabled (you can follow the same steps from Step 1).
Once done, your contacts will automatically appear on your new Android device.
Benefits of Using Google Account
- Automatic Backup: Contacts are saved and backed up in the cloud.
- No Extra Tools Needed: The process is done entirely on your phone, requiring no external apps or devices.
- Restoration Anytime: In case you lose or reset your phone, your contacts are safely stored in your Google account.
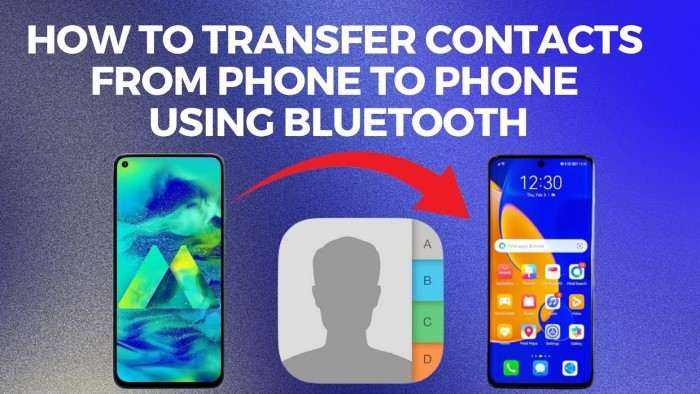
Transfer Contacts via Bluetooth

If you’re looking for a wireless method to transfer contacts without relying on cloud services, Bluetooth is a viable alternative. Though it may take a bit longer than Google Sync, it’s still a reliable method.
Pair Your Devices
- On both Android phones, go to Settings.
- Tap on Bluetooth and ensure that both devices are set to Visible.
- On one of the phones, search for available Bluetooth devices and pair the two phones.
Select and Share Contacts
- On the old Android phone, open your Contacts app.
- Select the contacts you wish to transfer (or select All Contacts if you want to transfer everything).
- Tap on the Share button and choose Bluetooth.
- Select your new Android device from the list of paired devices.
- On the new phone, accept the incoming file transfer request.
Advantages of Bluetooth Transfer
- Wireless Transfer: No need for internet or cloud services.
- No Account Required: Works independently of Google or other account-based services.
Drawbacks
- Slower Transfer Speeds: Bluetooth transfers can take longer, especially if you have many contacts.
- Manual Pairing: Requires both devices to be paired and manually accepting the transfer.
Transfer Contacts via SIM Card
If you prefer an offline method that doesn’t involve Bluetooth or the internet, transferring contacts via your SIM card is another option. SIM cards can store up to 250 contacts, which is sufficient for basic transfers.
Save Contacts to SIM Card
- On your old Android phone, open the Contacts app.
- Tap on the Menu (three dots in the top right corner).
- Choose Manage Contacts (or Import/Export).
- Select Export to SIM Card.
Insert SIM into New Device
- Turn off both phones and remove the SIM card from the old phone.
- Insert the SIM card into your new Android phone.
Import Contacts from SIM Card
- On the new phone, go to the Contacts app.
- Tap on Menu > Manage Contacts > Import from SIM Card.
Your contacts will now be transferred to your new Android device.
Pros of Using SIM Card
- Offline Transfer: No internet or Bluetooth required.
- Simple Process: Ideal for basic contact transfers.
Cons
- Limited Storage: SIM cards can only hold a certain number of contacts.
- No Additional Data: Only names and phone numbers are transferred, not other details like emails or addresses.
Using Third-Party Apps

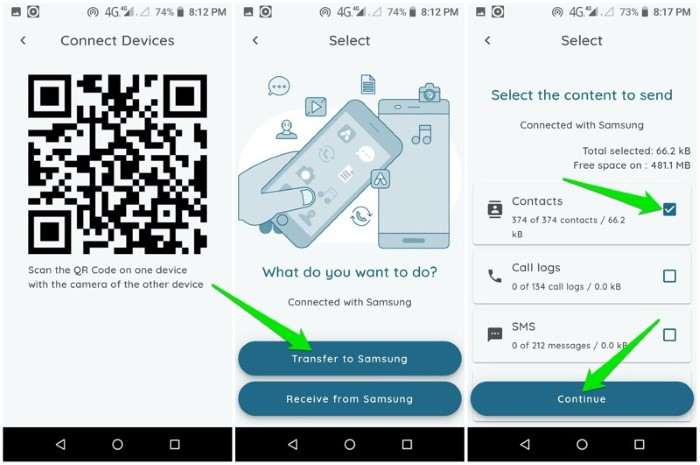
Various apps can assist you in transferring contacts between Android devices, often with added features for transferring other types of data as well. Popular apps like ShareIt, Xender, and My Contacts Backup can make the process easier.
Install and Open the App
- Download the preferred app (like ShareIt) from the Google Play Store on both devices.
- Open the app on both phones.
Send Contacts from Old Device
- On your old phone, select Send in the app and choose Contacts as the data type to transfer.
- Select the contacts you wish to send and tap Send.
Receive Contacts on the New Device
- On your new phone, select Receive within the app.
- The two phones will connect via Wi-Fi Direct, and your contacts will be transferred almost instantly.
Advantages of Third-Party Apps
- Fast Transfer: Using Wi-Fi Direct speeds up the process.
- Additional Features: Some apps allow the transfer of more than just contacts, including photos and apps.
Downsides
- Requires Installation: You must install and configure the app on both phones.
- Ads/Permissions: Some apps might come with ads or require additional permissions.
Sharing via Email
Another quick and easy method to transfer contacts between Android phones is by sharing your contacts via email. This option works especially well when transferring a smaller number of contacts.
Export Contacts to VCF File
- Open the Contacts app on your old phone.
- Tap on Menu > Manage Contacts > Export.
- Choose Export as VCF (Virtual Contact File).
- This will create a single file containing all your selected contacts.
Send VCF File via Email
- Open your Email app.
- Compose a new email and attach the VCF file.
- Send the email to yourself.
Download and Import VCF on the New Device
- On your new Android phone, open the email and download the attached VCF file.
- Open the Contacts app and choose Import > Import from VCF.
- Select the downloaded file, and your contacts will be imported.
Pros of Email Transfer
- Works Over the Internet: No need to pair devices or use physical cards.
- Handles Multiple Contacts: VCF files can store many contacts in a single file.
Cons
- Internet Required: This method requires email access and a stable internet connection.
- Less Convenient for Large Transfers: If you have thousands of contacts, exporting and importing VCF files might take extra time.
Related Post:
How to Stop Ads on Your Android Phone: A Comprehensive Guide
Discover the Best Drawing Apps for Android: Unleash Your Creativity with These Top Picks
A Comprehensive Guide to Downloading and Installing Juwa 777 for Android
Transferring contacts from one Android device to another doesn’t have to be a complicated task. Whether you choose to sync your contacts with a Google account, use Bluetooth, rely on a SIM card, or employ third-party apps, each method offers its own benefits based on your specific needs. For the smoothest experience, Google account syncing is recommended due to its convenience and automatic backup functionality. However, alternative methods like Bluetooth and SIM cards can be just as effective for those who prefer not to rely on cloud services.


