Why Scanning on Android is Useful

Before diving into the methods, it’s essential to understand why scanning with your Android phone is a powerful tool. Whether you’re a student, professional, or small business owner, the ability to scan on-the-go is immensely beneficial. Scanning documents with Android can help you:
- Eliminate the need for physical storage
- Quickly convert documents to digital format
- Send files directly via email or messaging apps
- Organize your documents efficiently
- Save time and effort over traditional scanning methods
Now, let’s explore the best ways to scan documents using your Android device.
Using Google Drive to Scan Documents on Android
Most Android devices come pre-installed with Google Drive, and its built-in scanning feature is one of the easiest ways to scan documents.
How to Use Google Drive for Scanning
- Open Google Drive: If you don’t have the app installed, you can download it from the Google Play Store.
- Tap the “+” Button: This button is located at the bottom right corner of the app. Tapping it will open a menu with several options.
- Select “Scan”: In the pop-up menu, select the “Scan” option, which will open your phone’s camera.
- Position Your Document: Place your document on a flat surface, and position your camera above it.
- Capture the Document: Tap the shutter button to take a picture of the document.
- Edit if Needed: After capturing, you can crop, rotate, or add multiple pages. Google Drive will automatically detect the edges and adjust the image.
- Save the Document: Once you’re satisfied, tap “Save.” You can rename the document and select the Google Drive folder where you want to store it.
Benefits of Using Google Drive for Scanning
- Cloud Storage: Your scanned documents are instantly saved to your Google Drive account, making them accessible from any device.
- Free to Use: Google Drive scanning is free and doesn’t require any additional app installation.
- Multi-Page Scans: Easily scan multiple pages into a single document.
Using Your Phone’s Built-in Camera for Scanning
Some Android phones, especially those with recent versions of Android OS, come with a built-in document scanner in the camera app. This feature is typically found in the camera’s “More” or “Extras” menu.
Steps for Scanning Documents Using Your Phone’s Camera
- Open the Camera App: Launch your phone’s default camera app.
- Switch to Document Mode: If available, look for “Document” mode, usually found in the “More” section of the camera settings.
- Position the Document: Align your camera with the document to ensure it is fully visible in the frame.
- Take the Picture: Tap the shutter button to capture the document.
- Edit and Save: Your phone will typically auto-detect the edges, and you can adjust the crop if needed. Save the scanned document as a PDF or image.
Pros of Using the Camera’s Built-in Scanner
- No Need for Additional Apps: This option doesn’t require downloading extra apps.
- Quick and Convenient: Easily access scanning functions from your native camera app.
Best Third-Party Scanning Apps for Android

While Google Drive and built-in camera features are handy, some third-party apps offer more advanced scanning options. Here’s a look at some of the best third-party apps for scanning with Android.
CamScanner
One of the most popular scanning apps, CamScanner provides a range of features for capturing, editing, and sharing documents.
How to Use CamScanner
- Download the App: Install CamScanner from the Google Play Store.
- Open the App: Once installed, open CamScanner and tap the camera icon.
- Capture the Document: Hold your phone over the document and take a picture.
- Edit the Scan: CamScanner will automatically crop the document. You can further adjust brightness, contrast, and other aspects of the scan.
- Save or Share: Save the scan as a PDF or image, or share it directly via email or cloud storage.
Features of CamScanner
- High-Quality Scanning: Advanced image processing ensures crisp and clear scans.
- Multiple Export Formats: Save scans as PDFs, images, or text files.
- Collaboration Features: Share and collaborate on scanned documents in real-time.
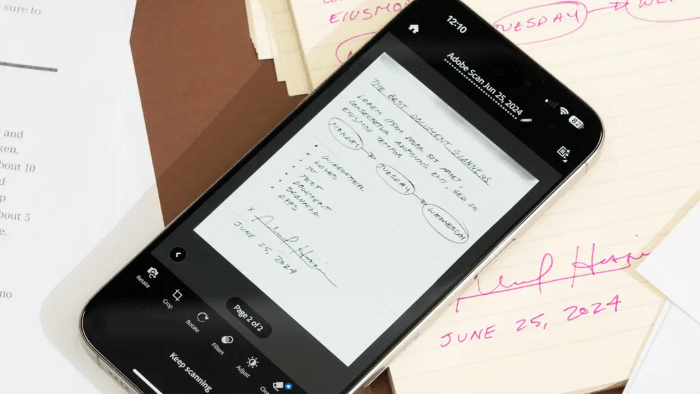
Adobe Scan
Another excellent option is Adobe Scan, which integrates seamlessly with Adobe’s suite of tools.
How to Use Adobe Scan
- Install Adobe Scan: Download Adobe Scan from the Google Play Store.
- Launch the App: Open the app and log in using your Adobe account (you can create one for free if you don’t have it).
- Start Scanning: Tap the camera icon to capture the document.
- Auto Detection: Adobe Scan will automatically detect edges and enhance the scan for better quality.
- Save to Adobe Cloud: You can save scans to Adobe Cloud, export as a PDF, or share through other channels.
Key Features of Adobe Scan
- Text Recognition: Adobe Scan has built-in OCR (Optical Character Recognition), which allows the app to convert scanned documents into editable text.
- Cloud Integration: Save your scans directly to Adobe Document Cloud.
- Multi-Page Scanning: Adobe Scan allows easy multi-page scanning and PDF creation.
Microsoft Lens
Microsoft Lens is a top-notch scanning app for Android users who are already integrated into Microsoft’s ecosystem.
How to Use Microsoft Lens
- Download Microsoft Lens: Available for free on the Google Play Store.
- Launch the App: Open the app and choose the “Document” mode.
- Scan the Document: Use your phone’s camera to capture the document.
- Edit and Enhance: Microsoft Lens will automatically adjust the edges, but you can manually edit the scan as well.
- Save to OneDrive or Office: You can save scans to Microsoft OneDrive, Word, or OneNote.
Notable Features of Microsoft Lens
- Microsoft Integration: Seamlessly integrate with OneDrive, OneNote, and other Microsoft Office apps.
- Text Extraction: Lens can extract text from images using OCR technology.
- Versatile Formats: Save scans as PDFs, Word documents, or PowerPoint slides.
Best Practices for Scanning with Android

No matter which method or app you choose, following some best practices will ensure better scan quality and overall efficiency.
Ensure Good Lighting
Poor lighting can lead to blurry or shadowed scans. Always scan your documents in well-lit environments to capture clear and detailed images.
Use a Flat Surface
Place your document on a flat surface and make sure it’s not bent or wrinkled. This will prevent distortion in the scan.
Align the Camera Properly
For the best results, position your phone directly above the document and align it evenly to avoid crooked scans. Most apps will provide edge detection to help with this.
Check Document Edges
Always verify the document’s edges are correctly detected before saving or sharing the scan. Adjust manually if needed.
Clean the Camera Lens
A dirty camera lens can lead to blurry images. Keep your lens clean for sharp and professional-looking scans.
Security Considerations When Scanning with Android
When scanning sensitive documents, it’s essential to be mindful of security. Here are some tips to keep your data safe:
- Use Secure Apps: Stick to well-known apps like Adobe Scan, Microsoft Lens, or Google Drive, which offer secure cloud storage and encryption.
- Password Protection: If you’re scanning confidential documents, consider saving them in password-protected PDF format.
- Regular Backups: Ensure your scans are backed up to secure cloud storage to avoid losing important documents.
Organizing and Managing Your Scans
Once you’ve scanned multiple documents, organization becomes key. Here’s how you can efficiently manage your scans:
- Use Folders: Create different folders within apps like Google Drive or OneDrive to categorize documents by type, date, or project.
- Tagging: Some scanning apps allow you to add tags for easy searchability.
- Regular Maintenance: Periodically review and delete unnecessary scans to keep your storage organized.
How to Find Downloads on Android: A Complete Guide for Beginners
How to Find My iPhone from an Android Device: A Step-by-Step Guide
How to Turn Off Safe Mode on Android: A Comprehensive Guide
Learning how to scan with Android opens up a world of convenience and efficiency. Whether you’re using Google Drive, your phone’s camera, or advanced third-party apps like CamScanner, Adobe Scan, or Microsoft Lens, the options are endless. With the right tools and best practices, you can transform your Android device into a powerful portable scanner, streamlining your document management process wherever you are.


