Understanding the Basics of Scanning on Android

Before diving into the specifics, it’s important to understand what scanning on an Android phone entails. Scanning involves capturing a digital image of a physical document or object, converting it into a format that can be saved, edited, or shared electronically. Android phones offer a range of tools and apps to accomplish this task with ease.
What is Scanning?
Scanning refers to the process of converting physical documents, photos, or other items into digital format using a device’s camera. The scanned image can then be saved as a PDF, JPEG, or other file types. This is particularly useful for archiving important documents, sharing information electronically, or even digitizing handwritten notes.
Why Scan on an Android Phone?
Scanning on an Android phone offers several advantages:
- Portability: Always have a scanner with you without carrying extra equipment.
- Convenience: Quickly capture and share documents from anywhere.
- Cost-Efficiency: Avoid purchasing a dedicated scanner or other hardware.
- Versatility: Use various apps and features for different scanning needs.
Built-In Scanning Features on Android Phones
Many Android devices come with built-in scanning features that make it easy to scan documents without needing additional apps. Here’s how you can use these features:
Using Google Drive for Scanning
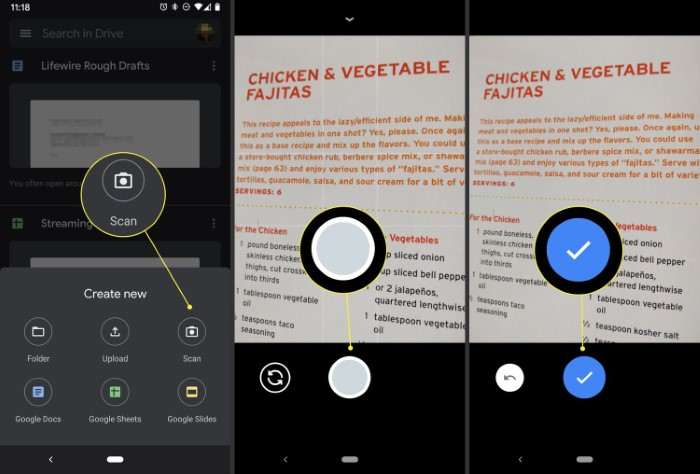
Google Drive has a built-in scanning feature that allows you to capture and store documents directly in your Drive account. Follow these steps:
- Open Google Drive: Launch the Google Drive app on your Android phone.
- Tap the “+” Icon: Look for the “+” icon usually found in the bottom-right corner of the screen.
- Select “Scan”: Choose the “Scan” option from the menu.
- Capture the Document: Position your phone’s camera over the document and capture the image. You can adjust the cropping area as needed.
- Save the Scan: Once satisfied with the scan, tap “Save” to store it in Google Drive. You can name the file and choose the location where it will be saved.
Using Microsoft Office Lens
Microsoft Office Lens is another built-in tool available for some Android devices. It’s designed for capturing and converting documents, whiteboards, and even business cards. Here’s how to use it:
- Install Office Lens: If it’s not already installed, download it from the Google Play Store.
- Open Office Lens: Launch the app and choose the type of document you want to scan (e.g., document, whiteboard, business card).
- Capture the Document: Position your camera and take the photo. Office Lens will automatically detect the edges and crop the image.
- Review and Save: Adjust the scan settings if necessary, then save the file to OneNote, OneDrive, or your local storage.
Third-Party Scanning Apps for Android

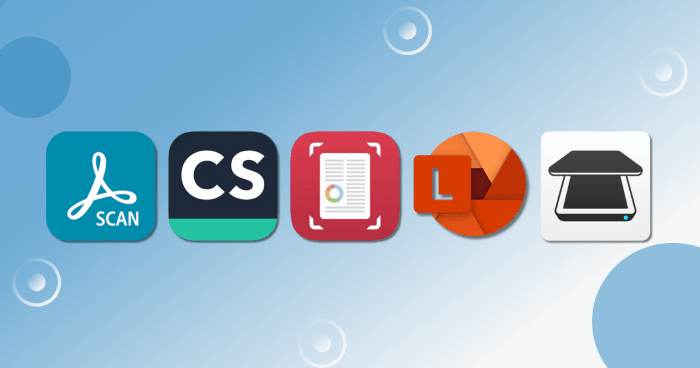
While built-in features are useful, third-party apps often provide additional functionality and flexibility. Here are some popular scanning apps you might consider:
CamScanner
CamScanner is a well-known app that offers a range of features for scanning and editing documents. Here’s how to use it:
- Download CamScanner: Install the app from the Google Play Store.
- Open the App: Launch CamScanner and tap the camera icon to start a new scan.
- Capture the Document: Align your document with the camera and capture the image. The app will automatically enhance the quality.
- Edit and Save: Use the app’s editing tools to adjust the scan, add annotations, or apply filters. Save the document as a PDF or image file.
Adobe Scan
Adobe Scan is another powerful scanning app that integrates with Adobe’s suite of tools. Here’s how to get started:
- Install Adobe Scan: Download the app from the Google Play Store.
- Launch the App: Open Adobe Scan and sign in with your Adobe account (or create one if you don’t have it).
- Scan a Document: Position your camera over the document and capture the image. Adobe Scan will automatically detect the edges and enhance the quality.
- Save and Share: Review the scan, make any necessary adjustments, and save it as a PDF. You can also share the file directly from the app.
Scanner App by Tooz
Scanner App by Tooz is a simple yet effective tool for scanning documents. Here’s how to use it:
- Download the App: Install Scanner App by Tooz from the Google Play Store.
- Open the App: Launch the app and select the type of scan you need.
- Capture and Adjust: Take a photo of the document, adjust the edges, and apply any necessary enhancements.
- Save and Export: Save the document in your preferred format and export it to cloud storage or email.
Tips for Optimal Scanning on Android
To ensure your scanned documents are clear and of high quality, consider these tips:
Use Good Lighting
Proper lighting is crucial for a clear scan. Natural light or a well-lit room will help avoid shadows and ensure even exposure. If scanning in low light, use your phone’s flashlight or adjust the lighting settings in your scanning app.
Keep the Document Flat
Ensure that the document you’re scanning is as flat as possible to avoid distortion. Use a flat surface and, if needed, press down gently on the edges to keep the document smooth.
Align the Camera Properly
Hold your phone steady and align the camera directly over the document. Many scanning apps have guides or auto-crop features that help with alignment, but it’s still important to avoid tilting or angling the phone.
Use the Right App Features
Take advantage of the features offered by your scanning app. For example, some apps allow you to adjust brightness, contrast, and color settings, which can enhance the quality of your scan.
Save and Backup Your Scans
Always save your scanned documents in a secure location. Use cloud storage services like Google Drive, Dropbox, or OneDrive to back up your files and ensure they are accessible from any device.
Troubleshooting Common Scanning Issues

Even with the best tools and techniques, you may encounter some common issues when scanning on your Android phone. Here’s how to troubleshoot these problems:
Blurry Scans
- Check Focus: Ensure your phone’s camera is in focus before capturing the scan.
- Hold Steady: Keep your phone steady to avoid motion blur. Consider using a tripod or a stable surface.
Dark or Poor Quality Images
- Improve Lighting: Enhance the lighting conditions where you’re scanning. Use natural light or additional lamps if necessary.
- Adjust Settings: Use the app’s editing tools to adjust brightness and contrast.
Misaligned Edges
- Reposition the Document: Align the document properly within the camera frame. Many apps have automatic edge detection, but manual adjustments may be necessary.
- Use Guides: Some apps provide guides or overlays to help with alignment.
Related Post:
The Ultimate Guide to Finding the Best Browser for Android in 2024
Mastering Split Screen on Android: A Comprehensive Guide to Multitasking Like a Pro
Scanning on an Android phone is a convenient and efficient way to digitize documents, photos, and more. With a variety of built-in features and third-party apps available, you can choose the method that best suits your needs. By following the tips and techniques outlined in this guide, you’ll be able to capture high-quality scans and manage your digital documents with ease. Whether you’re using Google Drive, Microsoft Office Lens, or a dedicated scanning app, mastering the art of scanning on your Android device will streamline your workflow and keep your important information at your fingertips.


