Understanding Screen Recording on Android

Screen recording allows you to capture everything happening on your screen in real-time, which can be particularly useful for a variety of reasons. From creating content to troubleshooting issues, knowing how to screen record can enhance your Android experience significantly.
Why Screen Record on Android?
Screen recording serves multiple purposes:
- Tutorials and How-To Videos: Perfect for creating step-by-step guides.
- Gaming: Capture your gameplay to share with friends or on social media.
- Troubleshooting: Record issues to share with tech support.
- Memories: Save moments from apps or videos that don’t offer a download option.
Using the Built-In Screen Recorder on Android
Many modern Android devices come with a built-in screen recording feature. This method is often the easiest and most straightforward way to capture your screen.
Accessing the Built-In Screen Recorder
To find and use the built-in screen recorder:
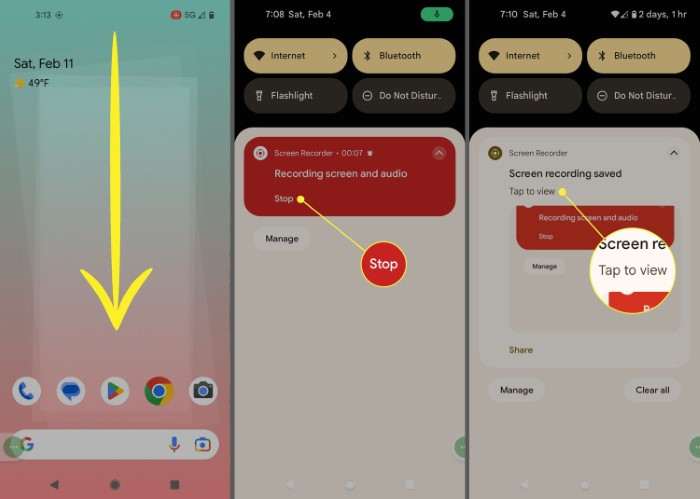
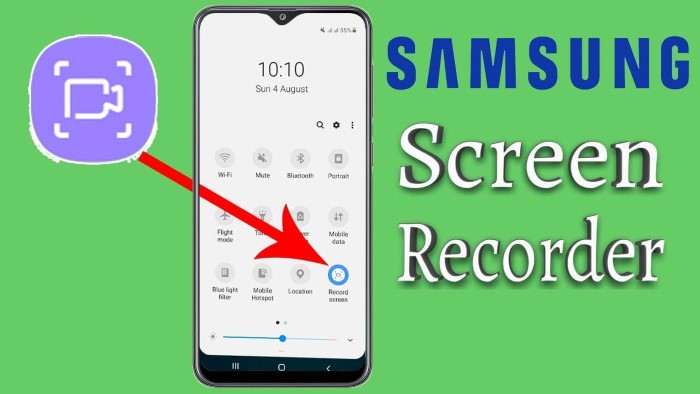
- Swipe Down: Pull down the notification shade to reveal the quick settings menu.
- Locate the Screen Recorder Icon: Look for an icon that resembles a video camera or a dot within a circle.
- Tap to Start Recording: Select the icon to start recording. You may be prompted to choose recording settings such as audio and video quality.
Configuring Screen Recording Settings
Before you start recording, you can often adjust settings such as:
- Audio: Choose to record external sound through the microphone or system audio.
- Video Quality: Select the resolution and frame rate for the recording.
- Show Touches: Enable this option if you want to display touch interactions on the screen.
Stopping the Recording
To stop recording:
- Access the Notification Shade: Pull down the notification shade again.
- Tap the Stop Button: Select the stop button to end the recording. Your video will be saved in the gallery or a designated folder.
Using Third-Party Apps for Screen Recording

If your device doesn’t have a built-in screen recorder or if you need more advanced features, there are several third-party apps available on the Google Play Store.
Top Screen Recording Apps for Android
Here are a few popular screen recording apps:
- AZ Screen Recorder: Known for its user-friendly interface and no watermark.
- Mobizen Screen Recorder: Offers high-quality recordings and various editing tools.
- DU Recorder: Provides comprehensive features including video editing and live streaming.
Installing and Setting Up a Screen Recording App
To install and use a third-party screen recording app:
- Search and Install: Open the Google Play Store, search for the app, and tap ‘Install.’
- Open the App: Once installed, open the app and grant necessary permissions.
- Configure Settings: Set up recording preferences, such as video resolution and audio options.
- Start Recording: Follow the app’s instructions to begin recording.
Tips for Using Screen Recording Apps
- Check Permissions: Ensure that the app has the necessary permissions to record your screen and audio.
- Explore Features: Take advantage of additional features like video editing, adding text, or overlaying images.
- Check Storage: Monitor your device’s storage space to avoid running out of space during recording.
Recording Screen with ADB (Android Debug Bridge)
For advanced users, ADB provides a command-line method to record your screen. This is particularly useful for developers or users who need precise control over their recordings.
Setting Up ADB
To use ADB:
- Install ADB: Download and install ADB on your computer from the official Android developer site.
- Enable Developer Options: On your Android device, go to Settings > About Phone and tap the Build Number seven times to enable Developer Options. Then, go to Settings > Developer Options and enable USB Debugging.
- Connect Your Device: Use a USB cable to connect your Android device to your computer.
Using ADB to Record Your Screen
- Open Command Prompt: On your computer, open Command Prompt or Terminal.
- Enter Recording Command: Type
adb shell screenrecord /sdcard/recording.mp4and press Enter. This command will start recording your screen and save the video file to your device’s internal storage. - Stop Recording: To stop recording, press
Ctrl + Cin the Command Prompt or Terminal. Your video will be saved to the specified location.
Editing and Sharing Your Screen Recordings

Once you’ve recorded your screen, you might want to edit or share the video. Here’s how to handle post-recording tasks.
Editing Your Screen Recording
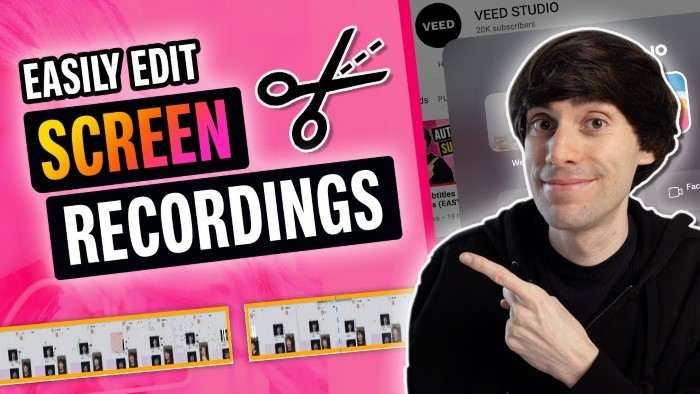
Editing can enhance your video by trimming unwanted parts, adding annotations, or adjusting the quality:
- Use Built-in Editors: Many Android devices come with basic video editing tools in the gallery app.
- Third-Party Editors: Apps like Adobe Premiere Rush or InShot offer advanced editing features.
Sharing Your Screen Recording
To share your video:
- Upload to Social Media: Share directly from your gallery or editing app to platforms like YouTube, Facebook, or Instagram.
- Send via Messaging Apps: Use apps like WhatsApp or email to send the video file to others.
Troubleshooting Common Issues
If you encounter problems while screen recording, consider these common issues and solutions:
Screen Recording Not Starting
- Check Permissions: Ensure the screen recording app has the necessary permissions.
- Restart Your Device: Sometimes a simple reboot can resolve minor issues.
- Update Your Device: Ensure your Android version and screen recording app are up-to-date.
Poor Video Quality
- Adjust Settings: Check the resolution and frame rate settings in your screen recording app.
- Free Up Storage: Make sure you have enough storage space on your device.
Audio Issues
- Check Audio Settings: Verify that the audio recording settings are correctly configured.
- Use External Microphone: For better audio quality, consider using an external microphone.
Related Post:
The Ultimate Guide to Android Digital Signage Players
How to Send Location on Android
Screen recording on Android has become a versatile and valuable feature, whether you’re capturing gameplay, creating tutorials, or saving memorable moments. With built-in options, third-party apps, and advanced methods like ADB, you have a range of tools at your disposal. By understanding these methods and troubleshooting common issues, you can effectively utilize screen recording to meet your needs.


